Lost Ark Guide: The main mechanics of the bosses of the abyss dungeons
Lsot AkrDate: May/03/22 15:44:24Views: 1445
The recently installed massive update 2.0 brought a new type of end-game content - "Dungeons of the Abyss". They are presented in the form of key plot dungeons of the continents, but each Boss has added new, sometimes complex mechanics and several new attacks.
In this article, we will only learn the basic mechanics of the bosses of almost every Abyss dungeon since most normal attacks can be dodged by carefully watching the red zones. Also, the pictures will be in places in Korean or Japanese due to specific reasons. Mechanic gifs can be found in the first post on the forum.
House of Death (Ruins of Elberta - Bern - 4 players)
Plague Colossus (1 boss):
All in all, a straightforward boss.
A sight mark appears over a random party member, and the Boss begins to prepare an attack. Once he's done, a puddle will appear underneath the player, dealing damage over time. Since the reservoir will not disappear until the Boss is exhausted, the player with the mark should run off to one of the corners of the map.
Periodically, the Boss will jump towards a specific player, dealing damage at the point of landing and then with a slight indent around him.
Merciless Garkul (2nd Boss):
This Boss has just a straightforward mechanic that will test your reaction.
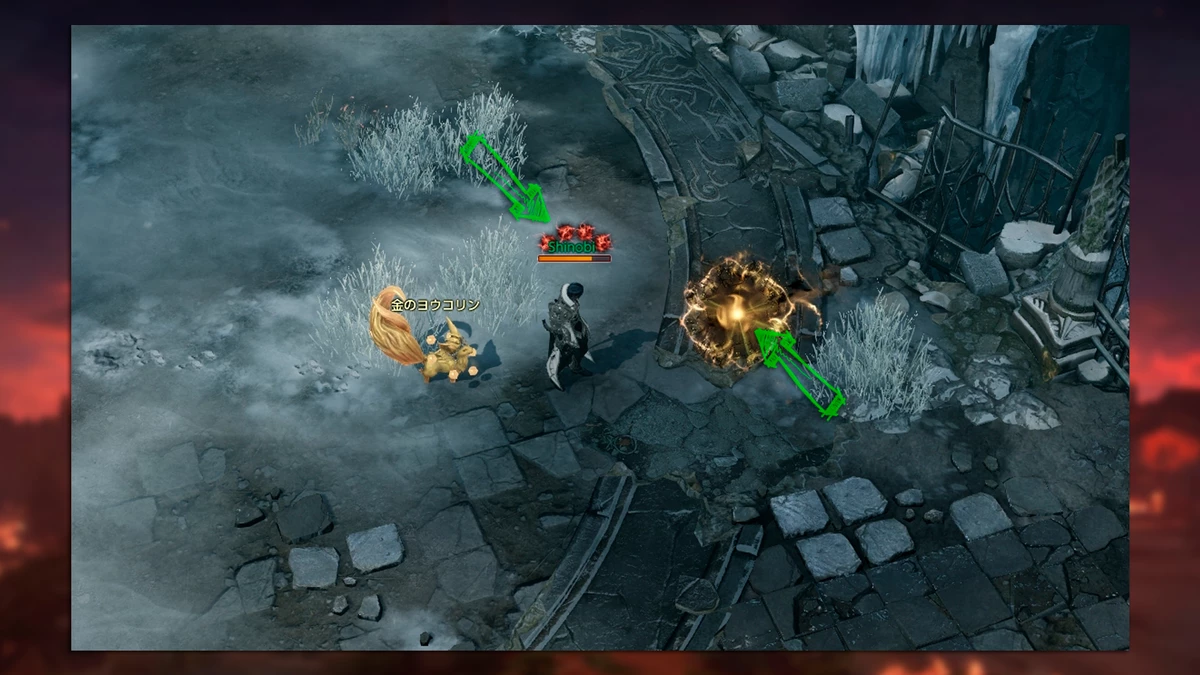
After a certain amount of time after the start of the battle, the Boss will abruptly move to the center, and four spheres will appear on the map (located above, below, and on the sides of the map).
After starting the mechanics, the Boss will periodically move to a random player and cast an AOE attack around him. Your task is to lure the Boss one by one to all the spheres so that he destroys them.
The exploding spheres place one stack of a unique debuff on the Boss. Once four stacks are accumulated, the exhaustion effect will work, opening a window for dealing damage and transferring the Boss to the base state.
We repeat the mechanics to the victorious.
The difficulty of the mechanic is avoiding damage from the Boss and the orb, or just from the Boss. Both deal good damage to your HP.
Necromancer's Rock (Elberia Ruins - Bern - 4 players)
Carrum (1 boss):
After the start of the battle, after X amount of time, the Boss releases a wave of energy/explosion and hangs one debuff on all group members, which is displayed as a tiny dot above his head.
As soon as one of the participants collects 5 points, the Boss will immediately cast an attack.
To avoid a wipe, you need to reset points using the yellow orbs that appear in the arena and a wave of energy.
The problem with this mechanic is that only one orb spawns in the arena, and therefore only one player can remove debuff stacks from themselves. Solving it is pretty simple - you need to build an activation sequence, for example, according to your position in the group. If you are in group 1, take the very first orb, and if the fourth - 4 orbs when the character has four stacks. The main thing is to activate it even under fear of taking damage. This is much better than wiping the whole team.
The Boss also has unpleasant attacks on the sides, front and back, which he alternates in a particular sequence depending on the current HP level.
Morgred (2nd Boss):
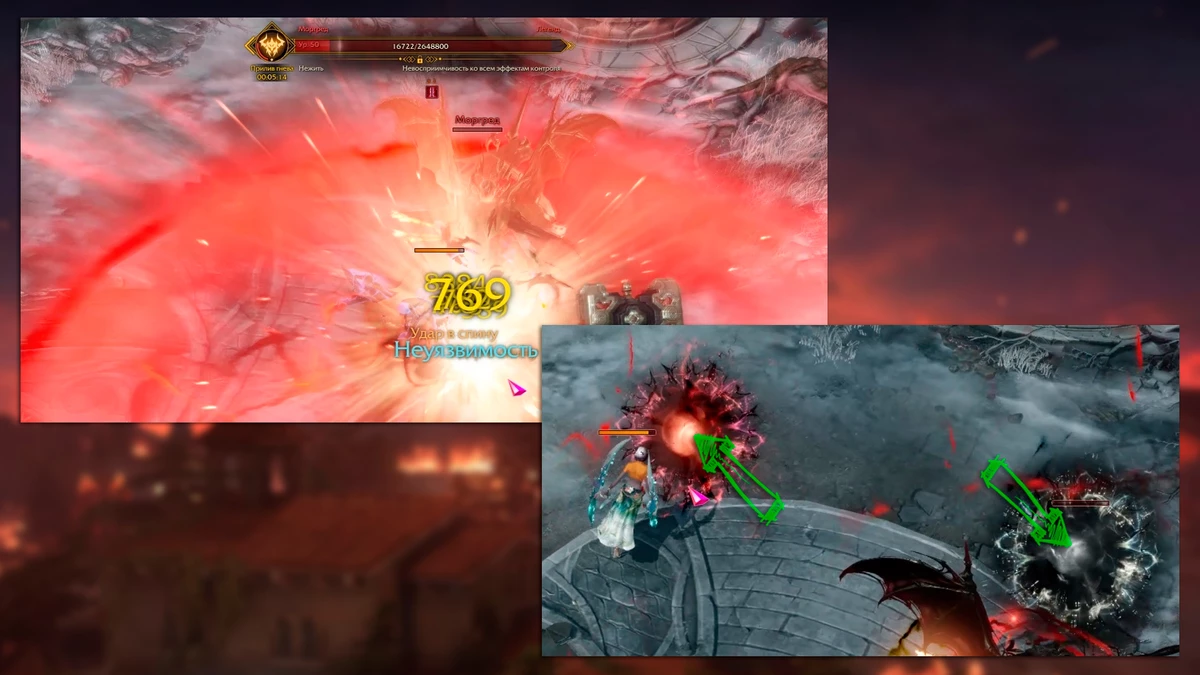
When the Boss's HP drops to zero, he does not die but releases a wave of energy while creating multi-colored spheres around the arena's edges.
After some time, the Boss resurrects with a certain amount of HP and one stack of damage amplification.
The group's task is to activate only spheres that match the color of the wave of energy. If you do everything right, the Boss will resurrect with less HP. Note that the damage buff is still present with each resurrection.
If the mechanics are performed incorrectly, using the wrong spheres, the Boss will recover several HP strips.
We repeat the process until the complete victory over the Boss.
Citadel of Illusion (Resident of Dreams - Rohandel - 4 players)
Black Rook and Bishop (1 boss):
You have to fight two bosses at once, but there are only two complex mechanics, although I would say one and a half.
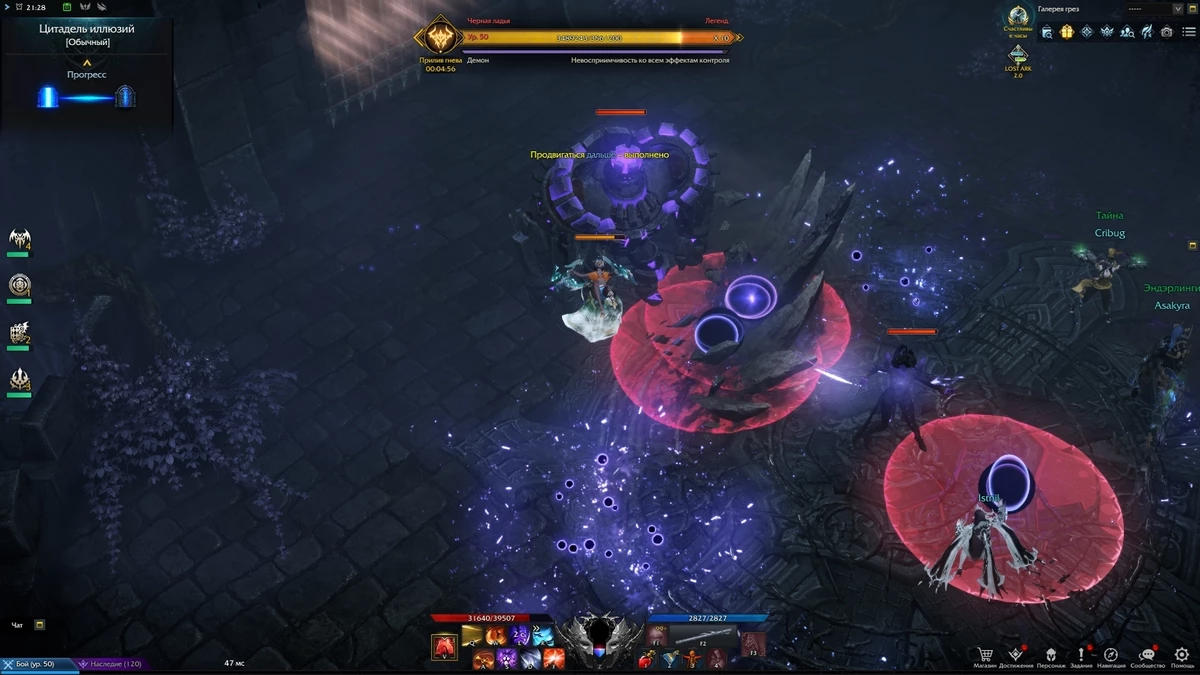
After a certain amount of time, Rook will be in the center of the room and create several columns around, and Bishop will begin preparing a dangerous attack. It would be best if you broke all the columns, after which a mark appears on one of the participants (the basic mechanics of a regular dungeon), and around the rest, there is a field that causes damage to nearby allies. The player with the mark needs to stand up so that the projectile fired by Rook hits Bishop strictly.
If you kill Bishop before Rook, the latter goes into a special enhanced mode until death.
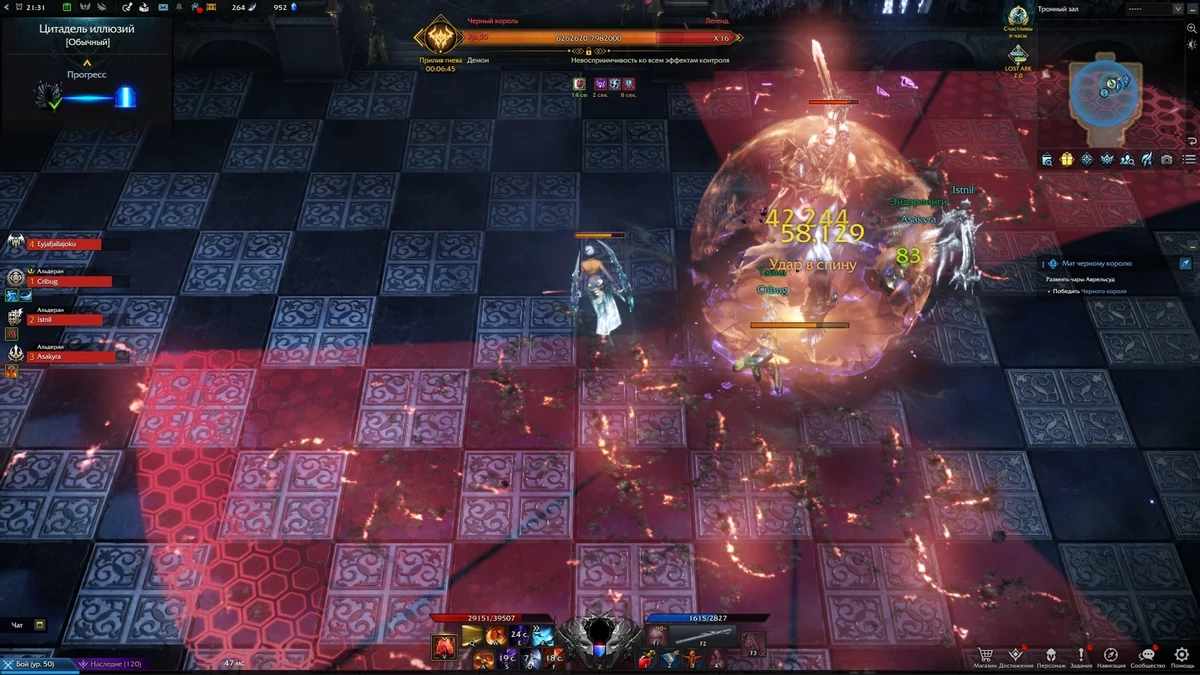
Black King (2nd Boss):
The Boss closes with a shield, and a yellow strip appears under it, and he also begins to cast two cone attacks in different directions alternately. Your task is to exhaust the boss / knock down the yellow bar, after which he will open up for a spell.
Usually, right after the above mechanic, the Boss will turn purple and teleport to the center of the room. After a short delay, he again closes his shield, releases four large homing swords toward the players, and begins preparing a wipe attack. It is necessary to exhaust the boss / knock down the security to prevent wipe mechanics, but this is not so easy to do.
Before starting the battle, determine the order, as in the case of Garrum. You have to perform the following mechanics: we run into one sword to get a buff and immediately go to beat the Boss. After you, other group members should repeat the same thing with a short interval.
If at least one player hits the shield without a buff, two players will take two swords simultaneously. The players will delay the order. The Boss will immediately cast a wipe attack.
Avrelsud Palace (Resident of Dreams - Rohandel - 4 players)
Black queen (1 boss):
As in the standard version, the Boss will periodically teleport to the center of the room and trigger a particular mirror mechanic. All the mirrors in the room are divided by color and are in pairs. The players' task is to determine the right team and thereby escape the wave quickly.
Also, the Boss can launch waves with gaps outside of the mechanics. They are pretty easy to dodge by standing in the hole. I did not notice any special damage from this attack.
Avrelsud (2nd Boss):
The boss fight takes place in two stages.
As in the regular version, you need to exhaust the Boss twice in the second stage. If this is not done within a certain period - wipe. Even 900+ characters can have trouble with this mechanic.
When the Boss tilts the arena and launches a stream of repulsive purple orbs, you'll have to perform the most frustrating mechanic. Periodically, a red line appears around a random player, and a small red projectile will fall on him after a certain amount of time. The task of this player is to be as close as possible to the Boss so that the projectile, when falling, catches him, puts him into exhaustion, and stops the mechanics of the balls.
In the second stage, the Boss triggers another nasty and slightly tricky mechanic that can lead to a wipe. A sparkling mark appears above one player, and a yellow beam or a large circle in front of them appears above the heads of the rest. The player's task with the mark is to stand still while the others try to direct the beam/place the circle precisely on him to burn the mark.
After a short time, a considerable meteorite will fall on the player with the mark, which hits most of the map. If you get rid of the mark, you need to get out of the AOE range. If you do not get rid of the mark, its bearer and nearby allies will be caught in a bubble that cannot be destroyed, and then - death.
As a result, you have two options for developing events: the first is to perform the mechanics, which is not entirely easy because of the rays (it is easier to direct the circle). The second is to sacrifice a person with a mark, while he must go to the far corner of the arena so as not to hook the allies and most of the AOE map from the meteorite.
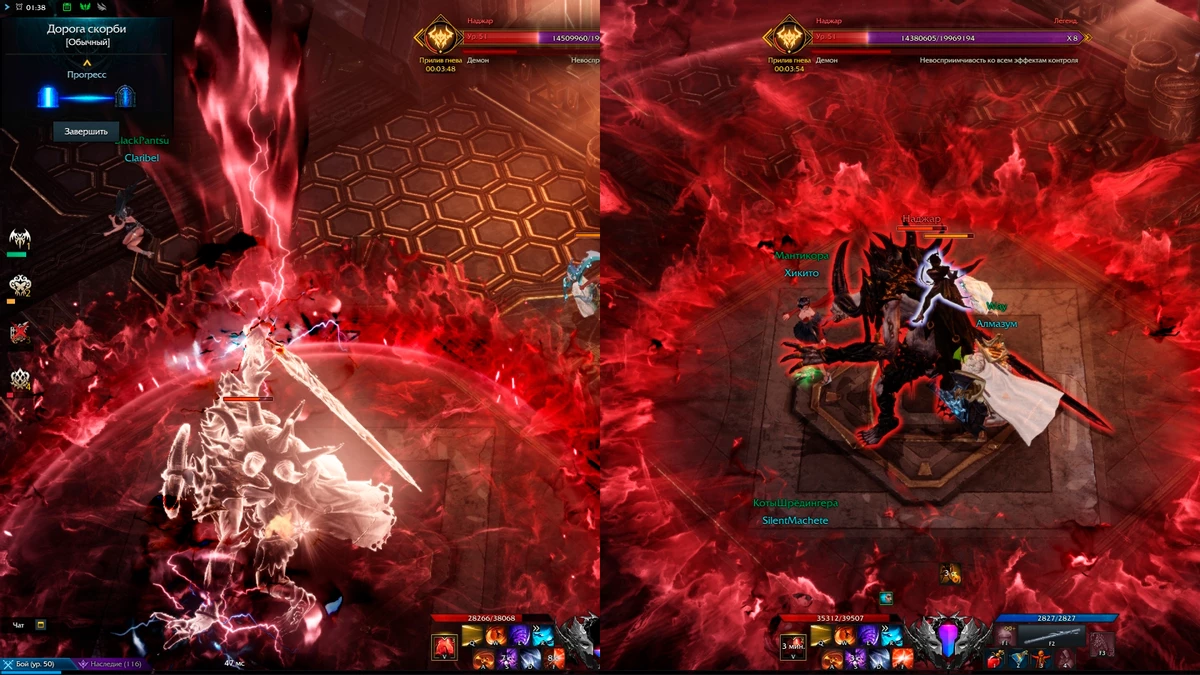
Path of Sorrow (Crucible of Souls - Yon - 4 players)
Najjar (1 boss):
Mechanically, it is the most challenging Boss of the dungeon due to one unpleasant mechanic.
The Boss runs to the center of the arena and creates a negative/safe zone around him, as luck would have it. After a short delay, he summons stun domes in random places in the room, spreads his arms to the sides, releases death rays, and begins to spin in place slowly.
Your task is to initially stand behind his back and move, avoiding hitting the rays, as they deal decent damage and can lower HP to zero in a couple of seconds.
In spinning in place, the Boss may stop and start spinning in the other direction. Keep an eye on this.
He usually repeats this mechanic twice, and the second time, before casting the beams, target marks will appear over one or more players. The task of these players is to go to the corner of the room because, after a short delay in their place, the Boss will cast domes. If this is not done, you can substitute the whole group.
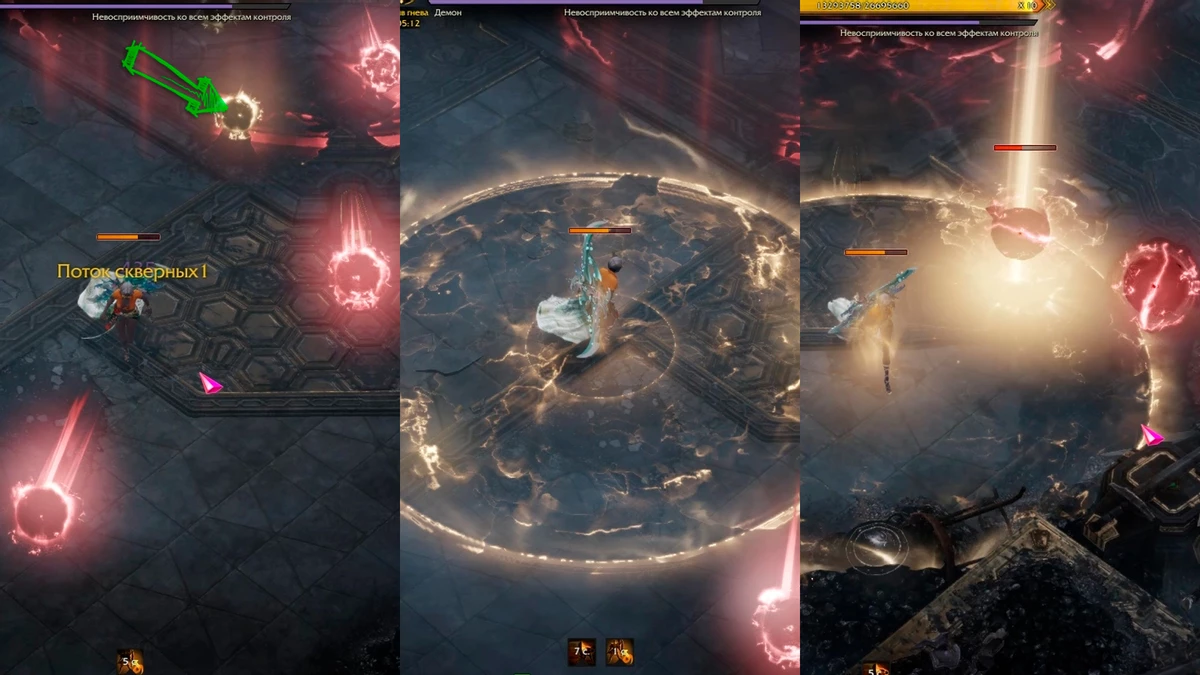
Keilara, Fetranian Seductress (Boss 2):
Two circular attacks (the first melee, second ranged) from the regular version pass without a visible red zone in the form of a donut.
Periodically, the Boss disappears from the map and then appears near a random party member to stun (an attack from the standard version). If the Boss successfully attacks, an AOE zone appears around him, dealing damage. Try to avoid this attack, as it delays killing the Boss a bit.
Periodically, a yellow bar of exhaustion appears under the Boss, and the final attack from the standard version begins to cast. Your task is to knock down the bar as quickly as possible before the end of the cast. Otherwise, the Boss will receive a buff for a few seconds, enhancing attacks and adding several new moves.
Red and yellow balls start flying out from the Boss in different directions. Your task is to catch three yellow balls to create an AOE zone around you. After a certain amount of time, the Boss teleports to the center, hits twice with an AOE attack around him, and starts the wipe mechanic.
As the Boss releases all the balls, large red spheres will appear around the edges of the room and, after a while, will begin to move towards the Boss. The task of the group members is to destroy all the red spheres with the help of the yellow AOE zone. You just need to be near the sphere to deal damage.
Performing a wipe mechanic is quite simple, following two rules - there are four corners in the room, and you have four people in the group. In theory, the mechanic can be done even with three players, but it will be more difficult.
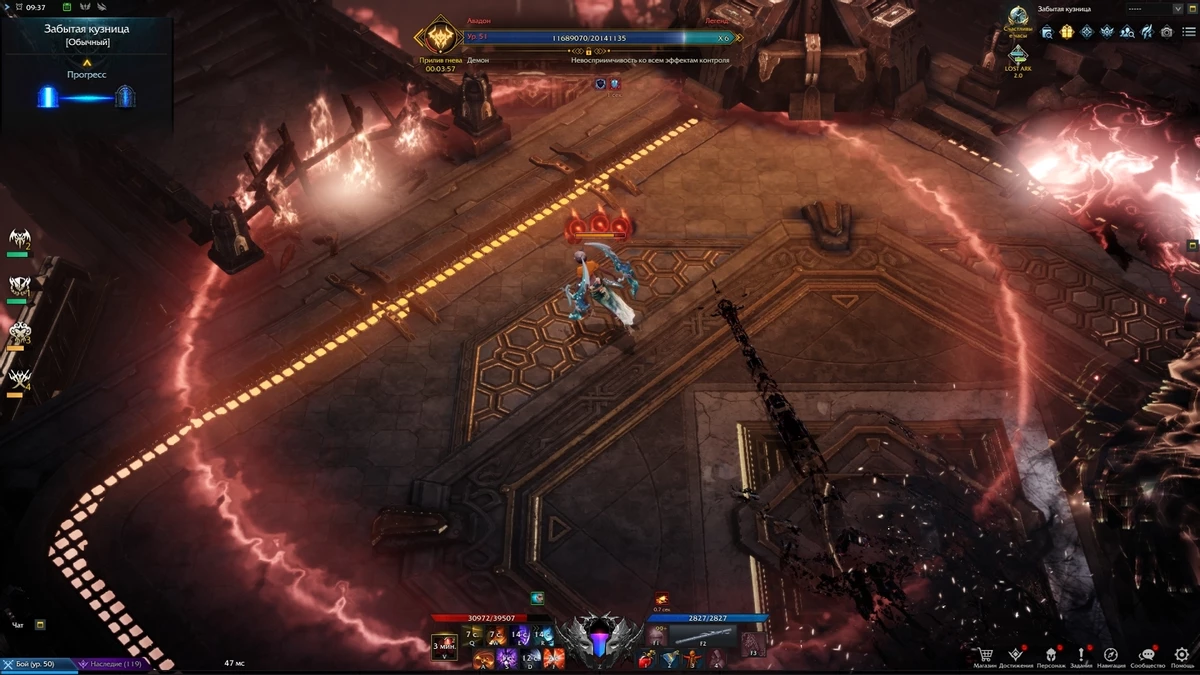
Forgotten Forge (Forge of Souls - Yon - 4 players)
Avadon (1 boss):
Periodically, a large AOE area appears around one or more group members, and red dots gradually appear above their heads. As soon as the total points reach three, an explosion will occur inside the AOE, causing massive damage to allies.
The task of a participant with an AOE zone is to go to the corner of the arena so as not to cause damage to allies who are trying to kill the Boss. The complexity of this mechanic arises when the AOE zone appears in 2-3 members of the group.
At about 8 and 4 health bars, the Boss summons two wyverns. They must be killed as quickly as possible. The Boss will receive a buff that increases his defense and movement speed if this is not done.
When the Boss has about 2-3 HP bars left, he will start to fall into a particular mode, which must be knocked down by exhaustion. At least that's what the tooltip suggests, but I haven't noticed any unique mechanics.
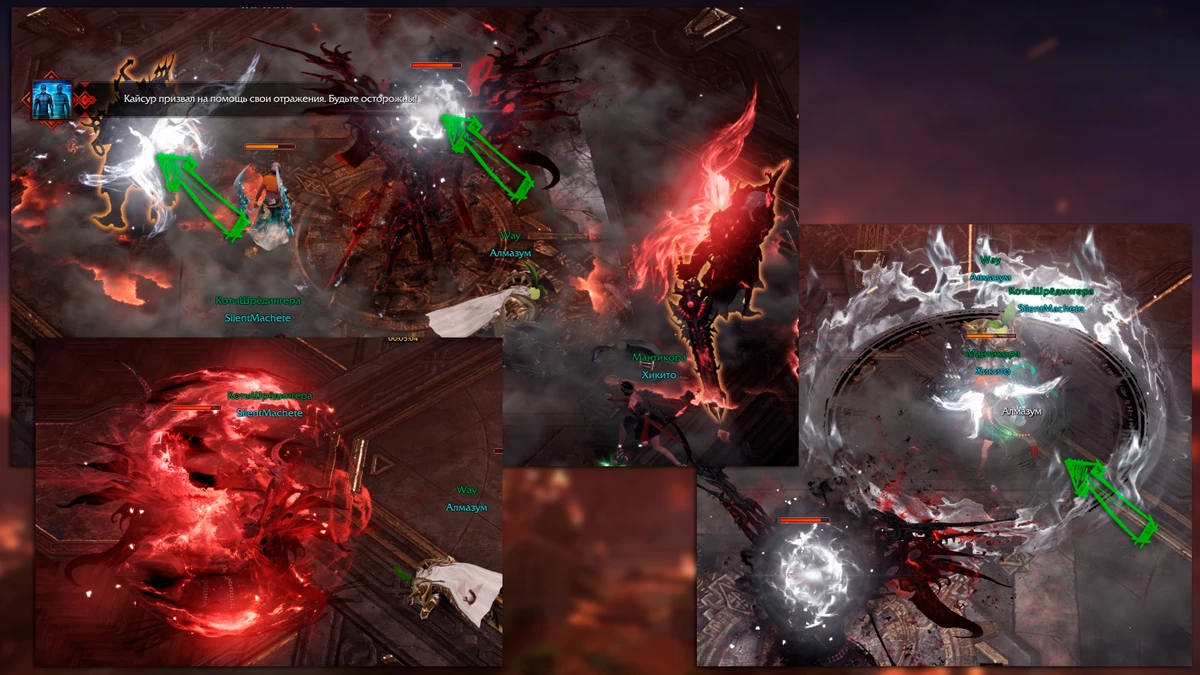
Kaisur (2nd Boss):
Periodically, the Boss covers himself with a round red shield - in no case should he be hit. Otherwise, the Boss will cast an AOE counterattack. It deals decent damage and can even instantly kill several group members. The mechanics are similar to the wings of the Mystic.
When the Boss teleports to the center and summons two copies of himself, the wipe mechanic begins to cast. Your task is to look at the color of the sphere that the Boss is holding in his hand and then kill the copy with wings of the corresponding color. If everything is done correctly, a slight aura will appear under the killed copy (the second one will automatically disappear) - a safe zone where you can survive the wipe attack.
Sea of Oblivion (Great Gate - Felton - 8 players)
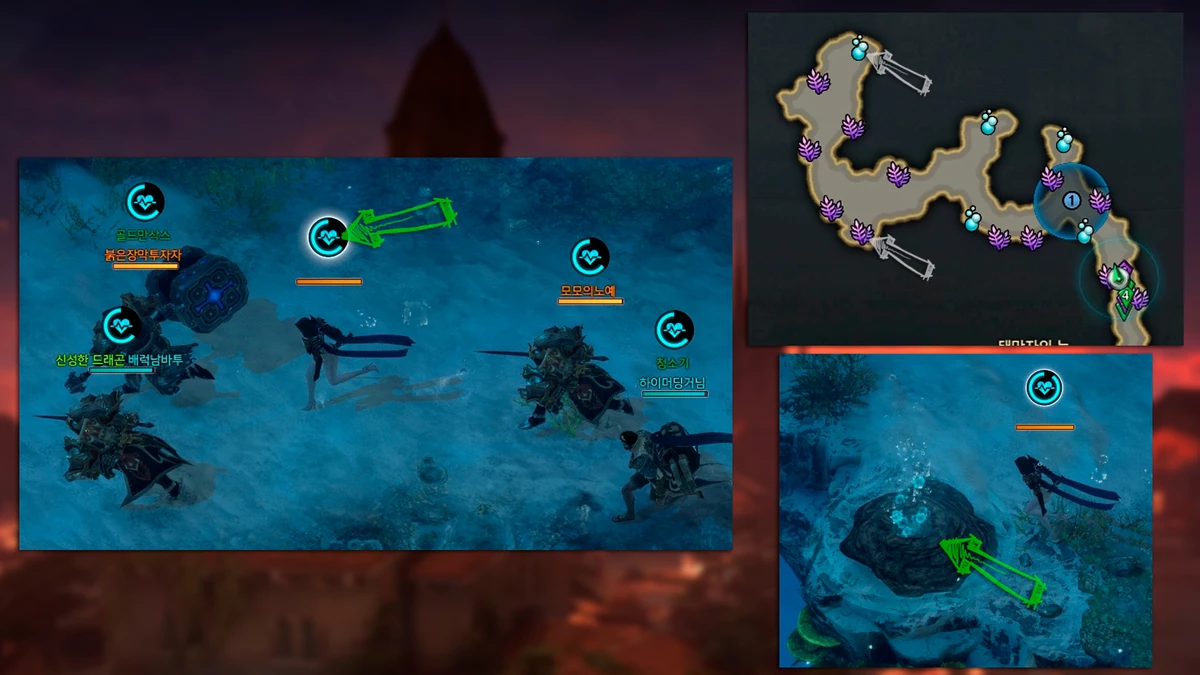
I will write once for all three dungeons of the Great Gate: since the battle takes place underwater, the character's air supply is limited and gradually consumed. It is reflected in the form of a small marker above the head, which gradually changes color. As soon as it turns red - the air is over, and HP will gradually decrease to 0. To replenish the supply of air, seaweed is scattered around the map (you must use it) and air pockets (you must stand and wait), which are displayed on the map with the corresponding icons.
Deep-Sea Orboros (1 boss):
The boss fight takes place in special underwater suits, and as a weapon, all group members will be given a harpoon or a glove. Their abilities are drastically different, and they most likely learn them in the intermediate phase of clearing mobs.
Your task is to kill a huge three-headed hydra, but at a certain point, it will summon another mini-boss - a shark, which will interfere in every possible way. After the death of the hydra, the mini-boss disappears on its own.
Of the dangerous attacks, I would note only the red AOE zones that the Boss periodically scatters around the map - this is a poison that causes minor initial damage but can regularly kill.
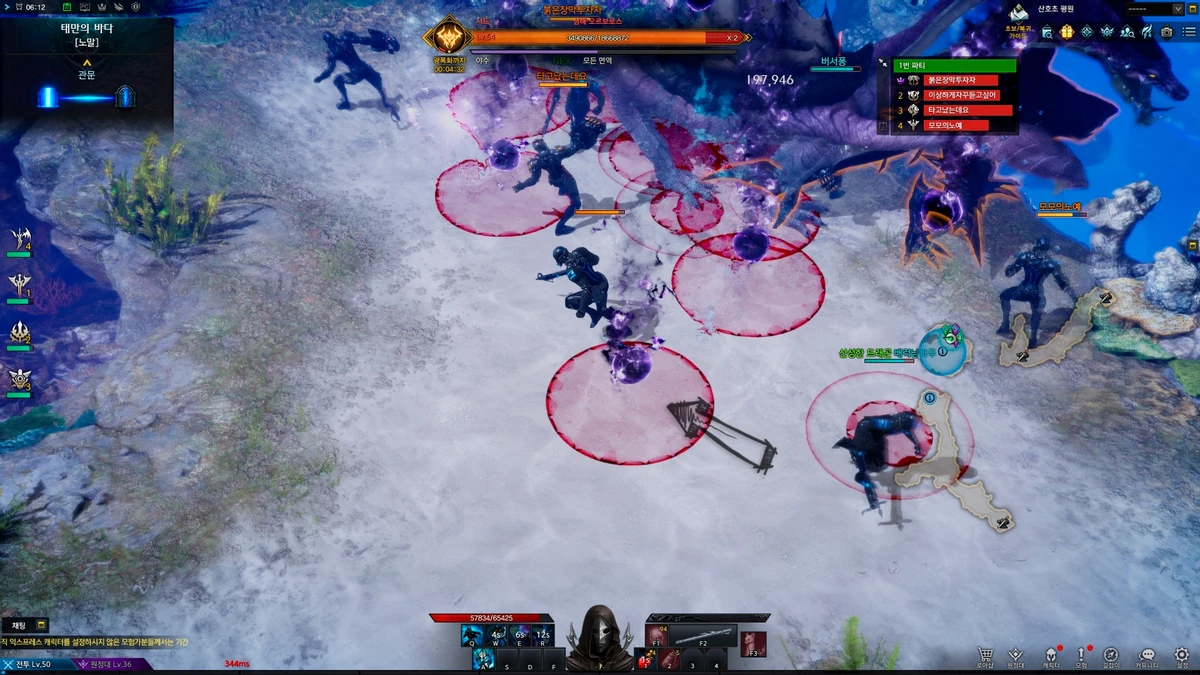
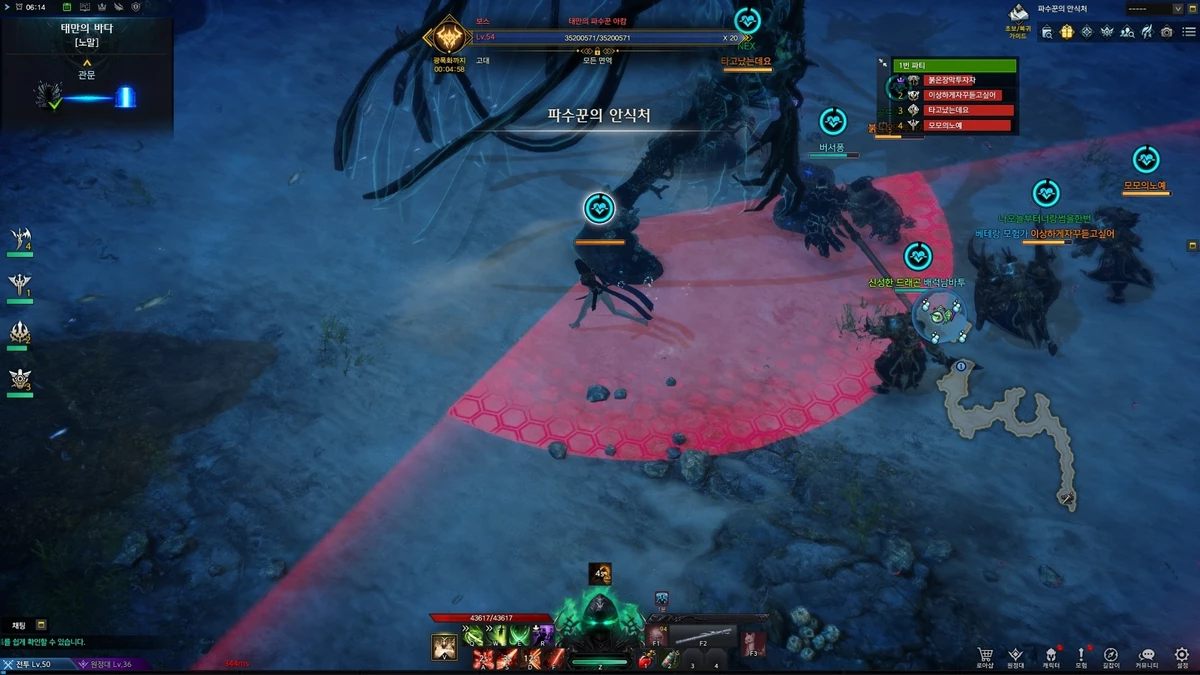
Arkham, Watchman of Neglect (2nd Boss):
After killing the first Boss, the underwater suit is taken away, and you will have to follow the mechanics of the air supply.
The fight with the Boss occurs in two phases: in the first one, he stands, and in the second, he burrows into the ground up to his waist. The differences are only in the attack patterns. You need to watch the red zones and dodge them.
The Boss has only one crucial mechanic that can lead to a wipe. Every 50 seconds, a white area with a column of light appears under a random player, and a red AOE zone begins to expand quickly. The players' task is to run into the white area as soon as possible so as not to take damage. Due to the peculiarity of this mechanic, try not to stray far from the central cluster of players.
Baneful Deep (Great Gate - Pheiton - 8 Player)
Eroded Storm Kaliban (1 boss):
In addition to the standard attacks with the red zone, the Boss has several hits with the yellow location in the arsenal. They reduce the air supply.
Periodically, muskets will appear above the heads of the players and a cone zone in front of them, which begins to narrow rapidly, and then a shot occurs. Your task is to make sure that there are no allies in front of you at the moment of the shot. For this, it is enough to run into a corner or turn away from the stones.
Periodically, the Boss creates a huge AOE zone around him and divides it into three parts - 2 blue and one red. If the Boss raised the anchor at the time of the attack, he would deal damage to the red zone, if the musket - to the blue one. The save zone of the anchor is blue, and the musket is red.
On the 15th and 8th HP bar, the Boss covers himself with an invulnerable shield. To destroy it, you must quickly kill two sea witches that have appeared in the arena.
After completing the above mechanic, the Boss will start charging (a yellow bar will appear below it) a wipe attack after a few episodes, summoning a vast ship. To stop it, you need to exhaust the Boss.
Karkosa's Killer (2nd Boss):
Periodically, the boss "stretches" cone AOE zones (pizza slices) towards several random players and deals damage and stuns with a short delay. Everything is simple here. The players need to arrange the areas so that they do not intersect and preferably where there are no allies. The player targeted by the pizza can avoid damage, as there is a short pause between "stopping" the area's movement and taking damage.
The Boss summons around fish at 18, 11, and 3 life bars. It must be focused on and killed as quickly as possible. The Boss will cast an AOE attack on almost the entire map if this is not done. It does not wipe but does significant damage.
Also worth noting is the nasty capture mechanic. The Boss jumps back and then dashes towards a random player, grabs and starts hitting them. You can knock down this attack by exhausting the boss / knocking down the yellow bar under him.
Karkosa's Lord Dry Khan (3rd Boss):
Some of the Boss's attacks inflict a slow debuff, which can be removed by collecting blue orbs in the arena.
The complexity of the last Boss lies in a single mechanic that will require coordination and well-coordinated actions.
At 16 and 8 HP bars, the Boss goes to the center of the room and starts the mechanics, creating a trigram around him with eight key points. Each point corresponds to the clock face (see picture below). Before launching the Boss, players need to distribute who is where in advance. The circular zone of replenishment of consumable Lost Ark items is ideal (Koreans do just that).
As soon as the mechanic starts, balls will fly into the Boss from each point, which players must catch, but since one character cannot see two balls of the same color, all players begin to move clockwise.
When you first start the mechanics on 16 lanes, balls of the same color fly out on each side, and on eight lanes, they can alternate, so you need to monitor whether the group should move or standstill carefully.
If you did everything right, the Boss would go into exhaustion.
A recurring system in MMORPGs, professions are no exception to the rule in Lost Ark. The game has a system where every component is useful, regardless of harvest level and rarity. Let's take a closer look at how it all works.